

Today I’m going to explain how we can write our own custom authenticator with WSO2 Identity Server. As you may already know, almost all the features of the WSO2 Identity Server can be extended and customized to cater to any business use case you have. And one of such extension point is the AbstractApplicationAuthenticator.
Methods of the Extension Point
Let’s go through the list of methods we need to override.
canHandle()
This method checks whether the authentication request can be handled by this particular authenticator. For example, the authenticator required username of the user in the request, we can check that. Authentication request will be handled by the authenticator, only if the canHandle method returns True.
process()
This method handles how each of the other methods will be called in the authentication flow. For a normal use case, we don’t need to override this method.
initiateAuthenticationrequest()
This method is the start point of the authenticator if the canHandle method returned true. You can use this method to redirect the user to the default login page or your own custom login page.
processAuthenticationResponse()
You custom authentication logic should go inside this method. You can do whatever you need to authenticate the user such as calling an external API or using your own user store, etc.
retryAuthenticationEnabled()
Defines whether retrying is enabled for the authenticator if the authentication failed due to some reason. Returns True if enabled, False otherwise.
getContextIdentifier()
This method can be used to get the Context identifier sent with the request.
getFriendlyName()
Returns the display name to be used in the management console.
getName()
Returns the name of the authenticator.
Now that you have a brief understanding of the methods in this extension point, let’s try to launch a sample authenticator and see what happens. You can get a sample I wrote from this Github location and build using the command mvn clean install.
This sample authenticator will only engage if the authentication request is of the type OIDC. And when engaged, it’ll look if the user has the role “customRole“. If the user doesn’t have that role, the authenticator will deny the authentication request.
Configuring the Local Authenticator.
- Get the latest WSO2 Identity Server if you haven’t already and extract into a preferred location.
- Copy the JAR file created inside the target folder of the cloned project, into repository/components/dropins directory of the extracted IS pack.
- Start the server. (Run the shell file wso2server.sh inside the bin directory.)
- Create a new role named customRole, create a new user and assign the custom role to the user.
- Now we need an application which we can log in through the Identity Server. We can use the sample OIDC application pickup-dispatch and we need to create a service provider in the Identity Server as well. If you need steps on how to do that, please read from Step 2: Getting the sample application of my previous post.
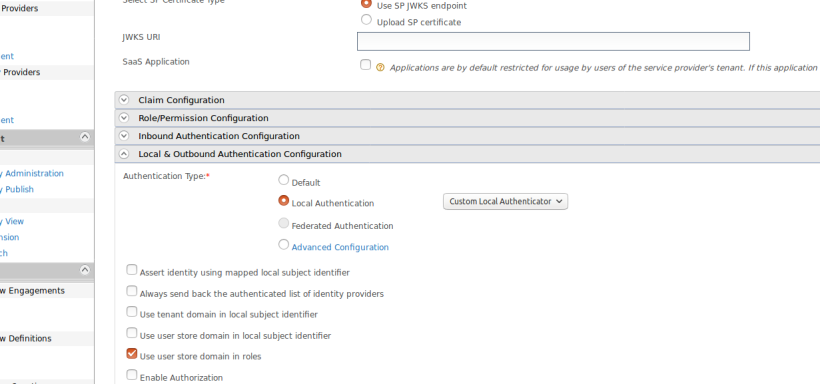
- After adding the service provider successfully, again go to the service provider settings, click on Local & Outbound Authentication Configuration and select the Local authentication option.
- Select Custom Local Authenticator from the drop-down menu and click on Save.
All the configuration steps are done and now we can test the flow.
Testing the setup.
- Access the URL http://localhost.com:8080/pickup-dispatch and you’ll see the welcome screen of the app with a login button. Click on it.
- In the login screen, let’s first try to log in with the admin user.
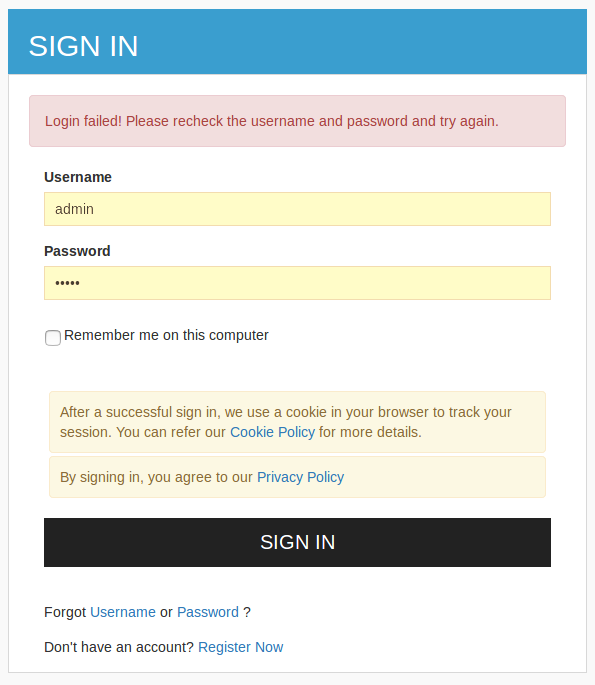
- If you check the server log, you’ll see a set of logs like below.
Authentication failed! User: admin doesn't have the role: customRole

- Authentication request was denied because the admin user doesn’t have the custom role.
- Now try to log in with the new user account we just created. Authentication should be successful and you should be redirected to the home page of the app.
That’s it! now you can tweak this sample code to cater your complex authentication logic.
Hope this is helpful. See you in another post. 🙂
