

This is the third post on the series about Identity Governance and today we’re looking into user account locking. Have a look on my Identity Governance 101: Popular User Stories first, to understand the big picture if you haven’t already done! Let’s dive in…
The Concept
This is a bit advanced user story that we can see in the Identity Governance category. Simply the idea is to lock the user account so that the user will not be able to login into the system nor use its resources. There could be multiple sub-stories that the ability to lock a user account is needed.
- Lock user account on incorrect login attempts.
- Keep new user accounts locked until a specific attribute is confirmed.
- Lock idle user accounts.
- Lock user accounts based on specific business logic.
Let’s look at each of these sub-stories in detail.
Lock user account on incorrect login attempts.
This is a well-known use case in the identity world and many organizations tend to use it for security purposes. In a nutshell, we keep track of consecutive invalid login attempts of a user and if that number exceeds a given threshold, we lock the account. In this case, we assume a malicious third party is trying to access the account.
WSO2 Identity Server supports this feature out of the box. Let’s see how we can enable and use it in action.
- Start the server and access the management console via accessing the URL https://localhost:9443/carbon.
- Log in to the management console using default admin credentials of admin and admin.
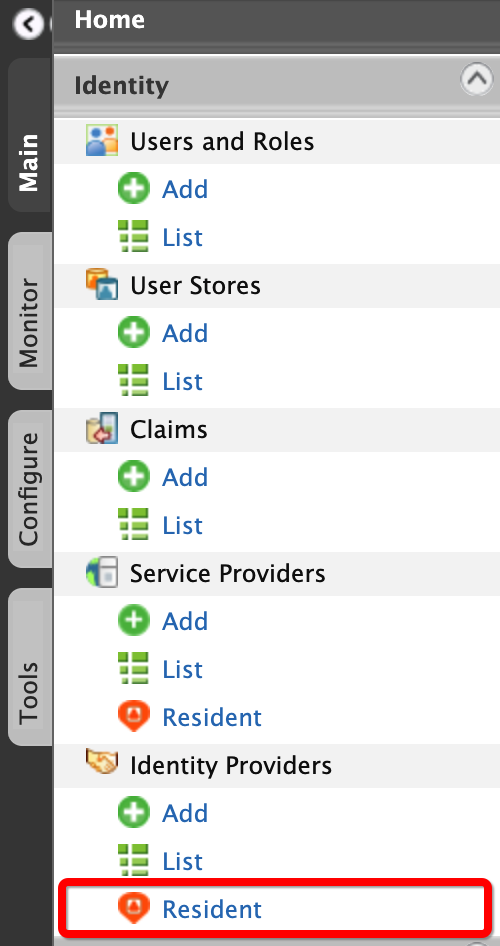
- On the Main menu, click Identity > Identity Providers > Resident.
- Then Login Attempts Security > Account Lock
- Tick Lock user accounts and click on Update below to enable account locking feature with default settings.

- Now that we have enabled the feature, we can test by creating a new user and trying to log in with an incorrect password.
- On the Main menu, click Identity > Users and Roles > Add.
- Click on Add New User and provide a preferred username and a password.
- Click Next and tick admin to provide admin privileges to the user.
- Click Finish to save the user.
- Now we can try to log in to an application using this user account. We can use the built-in myaccount application.
- Go to the URL https://localhost:9443/myaccount and provide the correct login details of your newly created user, just to verify that everything works as expected. If you got the below screen, then we’re good to go.

- Now click on the name in the upper right corner and click Logout.
- Then try to log in again with incorrect passwords. After exactly 5 incorrect attempts, try the correct username/password combination. The screen should still say Login failed! Please check your username and password and try again since the account has been locked now.
WSO2 Identity Server locks/unlocks user accounts using an attribute of the user profile. We can check the current value of this attribute to make sure the account is locked.
- Log in to the management console using the admin credentials.
- On the Main menu, click Identity > Claims > List
- Click on http://wso2.org/claims to select the wso2 claim dialect and then search for the attribute Account Locked.
- Click Edit and tick Supported by Default to view the value of this attribute in the user profile. Click on Update to save.

- Now go back to the Main menu, click Identity > Users and Roles > List > Users
- Click User Profile of your newly added user and you should see the account locked attribute is set to True.
Another part of this feature is, the locked account is automatically unlocked after a certain period. You can change this time in the account lock settings page we mentioned above. By default, this is set to 5 minutes, and if you followed the instructions above, it should’ve passed 5 minutes now. Try to login again using the correct credentials and this time the server should let you in.
You can also configure the WSO2 Identity Server to increase the account lock duration each time by setting the Account lock duration increment factor. By default, this is set to 2, which means if you failed to provide the correct username-password combination for the second time as well, the account will be locked not for 5 minutes, but to 10. Next time it’ll be 20 minutes, and so on.
Keep new user accounts locked until a specific attribute is confirmed.
We talked about this in my previous post, Identity Governance 101: User Self Registration, under advanced user cases. When a new user is self-registered to the system, we can keep the account locked until he/she verifies the provided email.

Lock idle user accounts.
This is another feature that is widely used in the identity domain. It’s a known fact that keeping unused, inactive user accounts in a system might lead to security vulnerabilities. Therefore, many organizations choose to disable these accounts after a certain idle period. WSO2 Identity Server equipped with this feature out of the box and let’s see how we can use it.
- Start the server and log in to the management console as admin.
- Idle account suspending also works through the same account lock component. Therefore we need to enable account locking first, as discussed above.
- On Resident identity provider settings, go to Login Attempts Security > Account Lock and tick Lock user accounts. If you do not wish to use the account lock feature on failed login attempts, you can simply increase the Maximum failed login attempts to a higher value.
- Now go to Account Management > Idle Account Suspend and tick Suspend idle user accounts to enable idle account suspending.

- You can define the idle time period in days in the next line.
- You can also send alerts to idle users by setting Alert sending time periods.
How Account Lock Feature Works?
Before we discuss our last sub story, it’d be best to understand how the account lock feature works in WSO2 Identity Server.
WSO2 Identity Server uses user attributes or claims to store the status of each feature. Below is a list of such claims.
- http://wso2.org/claims/identity/accountLocked – Denotes whether the account is locked or not.
- http://wso2.org/claims/identity/failedLoginAttempts – Number of failed login attempts.
- http://wso2.org/claims/identity/unlockTime – Time to unlock the account, if locked.
To check the values of these user attributes for each action such as login, there are event handlers implemented. As the name suggests, event handlers are listening for particular events in the server and act upon them. You can read more about events in my WSO2 Identity Server Events post.
To handle account locking, we have the AccountLockHandler. This handler is subscribed to 2 basic events of the WSO2 Identity Server. PRE_AUTHENTICATION and POST_AUTHENTICATION. PRE_AUTHENTICATION is triggered when a user is trying to log in to the system, but before all internal logic is executed. At this instance, the handler checks the accountLocked claim of the user and if it’s true, it doesn’t allow the user to pass through. If the account is not locked, the internal logic will execute and the POST_AUTHENTICATION event will be triggered. At this moment the handle again engages and updates failedLoginAttempts claim of the user, if the user entered invalid credentials.
If the user account is locked, a specific time to unlock the user account is defined and stored in the unlockTime claim. If the user tries with the correct credentials after the unlock time, the user account will be unlocked by the same handler.
Now that we have a general understanding of how the feature work, we can use that knowledge to lock a user accounts for our specific use cases.
Lock user accounts based on specific business logic.
First of all, the server administrator can directly lock a user account when using the WSO2 Identity Server. To do this, first we need to enable the account lock feature by following the steps we discussed above. After that, we just need to set the accountLocked claim to True, of the user we need to lock. To do this, first we need to set this particular user attribute visible to the user profile. I’ve given the steps to do this above.
you can also decide to lock a particular user account depending on your business requirements. For example, you’d need to lock a particular user account if his/her subscription is expired.
WSO2 Identity Server can be used to cater to these cases as well by implementing custom event handlers. I won’t discuss that in this post, but I’m hoping to write another article on it in the future.
Now that we’ve discussed the basic use cases of user account locking and how we can see them in action using WSO2 Identity Server, I think it’s time to end this article. If you have any questions, please don’t hesitate ask in the comments.
See you in another post! 🙂
